Purpose of equipment:
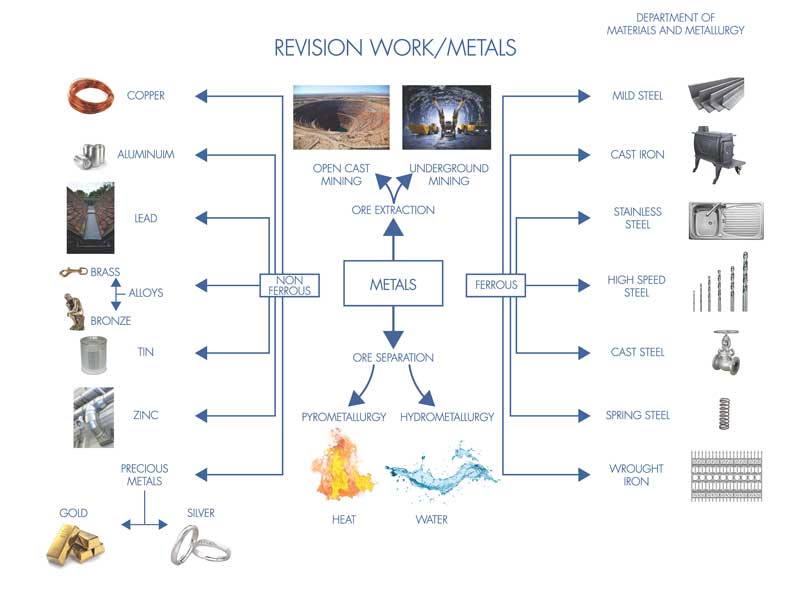
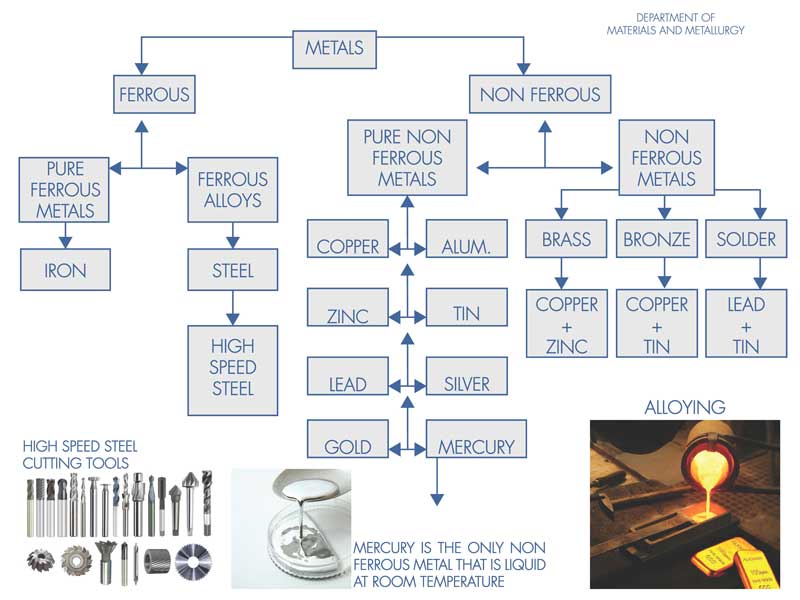
Production of many metals (complex steels, cast iron, grey iron, ductile iron, compacted graphite iron, aluminium alloys, copper alloys and silver) are aided by a production technique also referred to as thermal analysis. A sample of liquid metal is removed from the furnace or ladle and poured into a sample cup with a thermocouple embedded in it. The temperature is then monitored, and the phase diagram arrests (liquidus, eutectic, and solidus) are noted. From this information chemical composition based on the phase diagram can be calculated, or the crystalline structure of the cast sample can be estimated for different alloys.
Strictly speaking, these measurements are cooling curves and a form of sample controlled
thermal analysis whereby the cooling rate of the sample is dependent on the cup material
(usually bonded sand) and sample volume which is normally a constant due to the use of
standard sized sample cups (graphite, clay graphite, steel, ceramic, and Alumina).
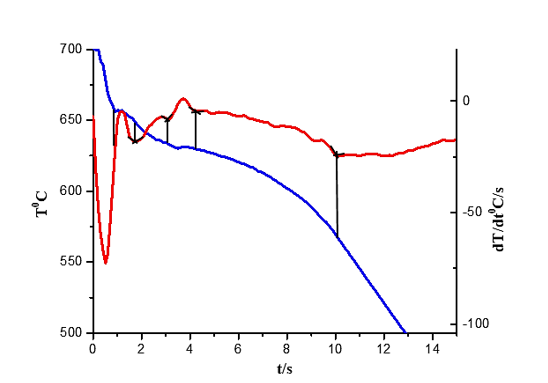
To detect phase evolution and corresponding characteristic temperatures, the cooling curve and
its first derivative curve should be considered simultaneously. Examination of cooling and
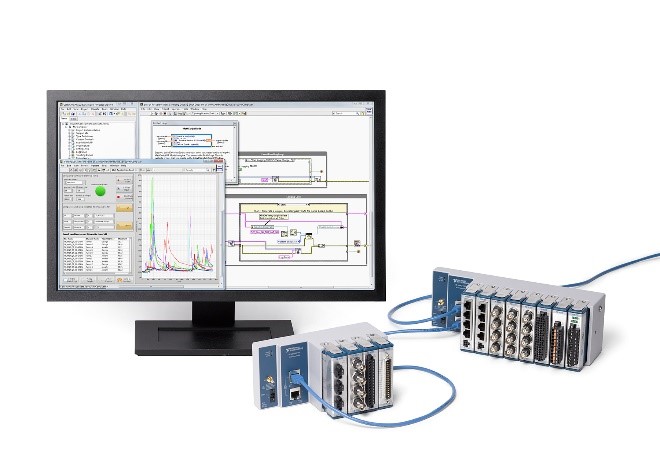
derivative curves is done by using appropriate data analysis software (labview and origin). The process consists of plotting, smoothing and curve fitting as well as identifying the reaction points and characteristic parameters. This procedure is known as Computer-Aided Cooling Curve Thermal Analysis. The characteristic points indicate the formation of individual phases of the microstructure and analysis is suitable for determining the state of the melt in the manufacture and laboratories to department of Materials and Metallurgy. This equipment (CDAQ) is in department of Materials and Metallurgy and we used for
analysis of melting metals, diagrams, cooling curves, solid and liquid states.
Applications:
Determines melting point for different metals
Constitution of diagrams
Solid and liquid states.
Examination of cooling curves and derivative curves
Determines of liquidus and solidus curves
Determines reactions (peritectic, eutectic, eutectoid)
Detect evaluation of phases
[/accordionitem]
[accordionitem]
MEASUREMENTS OF TEMPERATURES
Purpose of equipment:
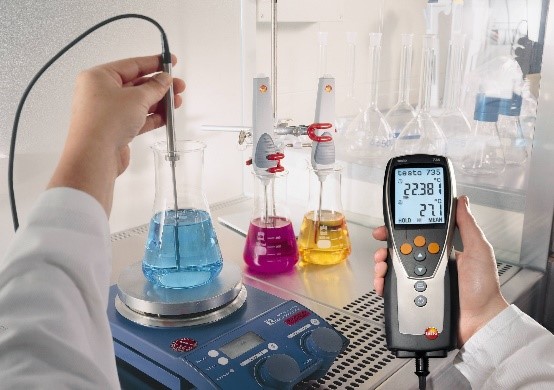
- In the Materials and Metallurgy department we have different types of devices for measuring temperatures. One of the most used is the test thermometer 735. The testo 735 digital multichannel thermometer is used in a variety of different fields. It can measure the surface, air, and core temperature of a wide range of media, with an accuracy up to 0.09 °F (using high-precision Pt immersion / penetration sensors). Can be wirelessly connected to as many as 3 external temperature sensors, whose readings are then transmitted to the display, so what you get is not a 3, but a 6-channel meter! The testo 735 multichannel thermometer has a sensor connecting point for a highly-accurate Pt100 sensor, and two connecting points for quick type K, T, J, and S thermoelement sensors.
Applications:
-
- Temperature measurement in the metal industry
- Temperature measurement in laboratory for different metals
- Measurement of the heating of electronic components
- Calibration of stationary temperature probes
- Measuring temperature in a chemical laboratory
 [/accordionitem]
[accordionitem]
CUTTING EQIPMENT
Purpose of equipment:
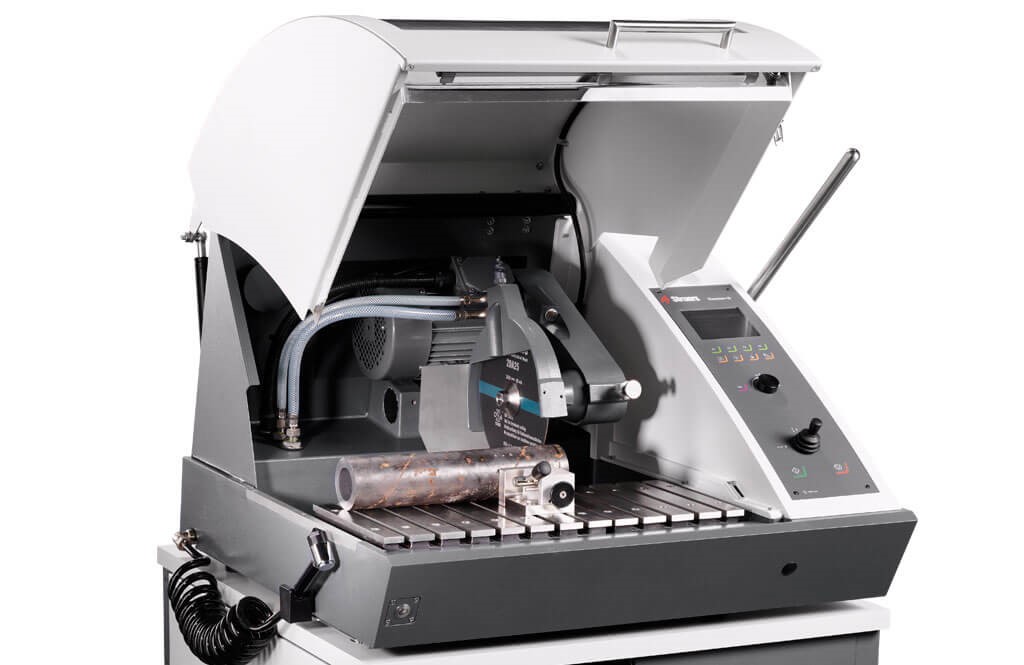
- Cutting machine is designed to give a cost-efficient opportunity to expand cutting capabilities and streamline cutting processes. Spacious, versatile, and easy to use. This equipment deliver exceptional cutting flexibility, with more cutting options clamp and cut all types of workpieces efficiently, with less effort and minimum deformation. This equipment (struers) is intended for the preparation of samples in order to continue with other preparation methods for metallography.
Applications:
- Cutting Metals, materials,
- Preparation samples for metallography
[/accordionitem]
[accordionitem]
GRINDING POLISHING EQUIPMENTS
Purpose of equipments:
-
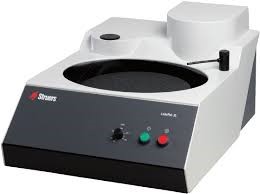
In the traditional approach, either manual (hand polishing) or semi-automated devices are used. Water-cooled silicon carbide paper (200- to 300-mm, or 8- to 12-in. diameter) was employed for the grinding stage; the initial grit size selected depended on the technique used to generate the cut surface. The usual grinding grit sequence was 120, 240, 320, 400, and 600-grit. Finer grit sizes could be used for highly alloyed tools steels in which carbide pullout is a problem. Grinding pressure should be moderate to heavy, and grinding times of 1 to 2 min are typical to remove the scratches and deformation from the previous step. Fresh paper should be used; worn or loaded paper will produce deformation. In the traditional approach, polishing was commonly performed using one of more diamond abrasive stages followed by one or more final abrasive stages, generally with alumina abrasives. For routine work, polishing with 6- and 1-µm diamond was a common practice. The diamond abrasive could be applied to the polishing cloth in paste, suspension or spray form. For the coarser diamond abrasives, low-nap or napless cloths were utilized; a medium-nap cloth was generally used with the finer diamond abrasives. Many years ago, canvas was often used with coarse diamond sizes and flocked cloths were used with diamonds from 6 to 1-µm. This tended to produce excessive relief, however. A lubricant, or “extender,” compatible with the diamond abrasive was added to moisten the cloth and minimize drag. Wheel speeds of 150 to 300 rpm and moderate pressure should be used. Polishing times of 1 to 2 minutes were usually employed.
Final polishing was also conducted manually or semi-automatically using various devices. Alumina abrasives, generally 0.3-µm α-alumina (Al2O3) and 0.05-µm γ-Al2O3, were widely employed with medium-nap cloths for final polishing. Colloidal silica (SiO2), with a particle size range of 0.04- to 0.06-µm, was very effective. Wheel speeds, pressures, and times are usually the same as for rough polishing with diamond abrasives, although some used lower wheel speeds and pressure. In general, hardened tool steels are relatively easy to polish to obtain a scratch-free and artifact-free condition due to their relatively high hardness. These equipments (struers) are in department of Materials and Metallurgy and intended for the preparation of samples in order to analysis-interpretation of images with Optic Microscope.
Applications:
- Grinding
- Polishing

[/accordionitem]
[accordionitem]
MOUNTING EQIPMENT
Purpose of equipment:
-
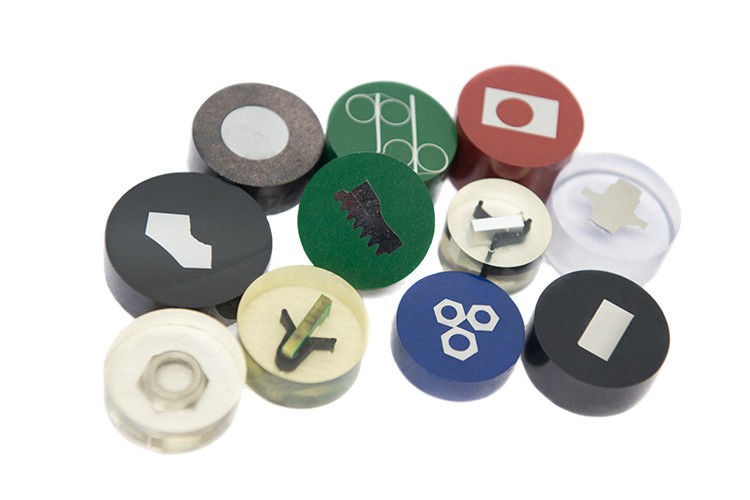
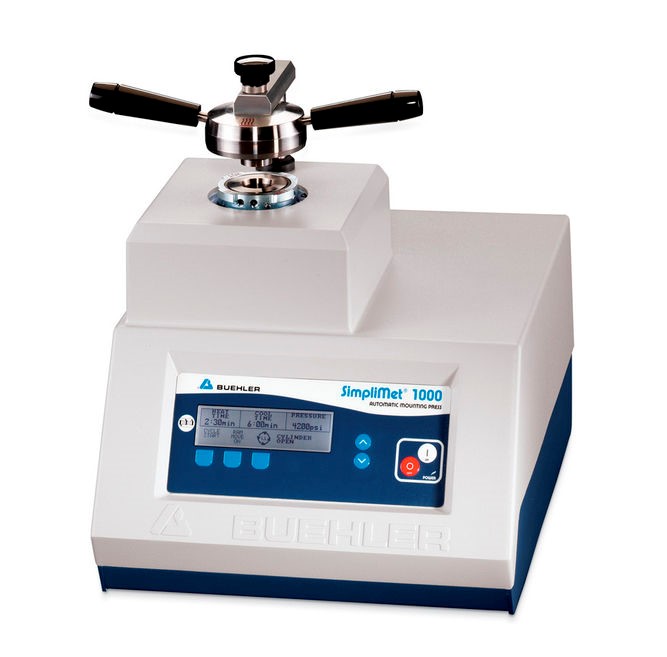
Compression mounting press, vacuum systems & mounting media consumables that include compression mounting compounds, acrylic systems, epoxy systems , release agents & mounting accessories. Mounting specimen is important for ease of handing and preservation of the sample edge. When deciding on which mounting technique to use, consider the size and geometry of part, the part’s susceptibility to heat and pressure, and the desired throughput. This equipment (Buehler 1000) is intended for the preparation of samples in order to analysis-interpretation of images with Optic Microscope
Application:
- Mounting samples
- Mounting epoxy systems
- Mounting acrylic systems
INDUCTION MELTING FURNACE
Purpose of equipment:
-
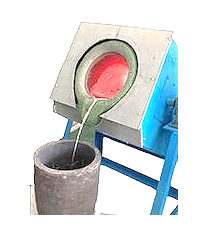
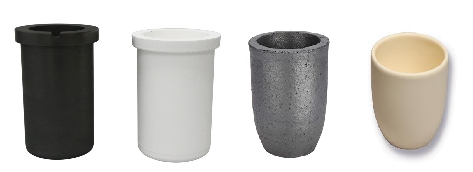
Induction melting furnaces capable of melting ferrous, non-ferrous, precious metals. The crucible can be tilted, the drive can be electrical, hydraulic or hand wheel. The frequency converter design approach uses parallel resonant typology adopting the latest and most advanced IGBTs modules available worldwide. Galvanic insulation between coil and power mains gives the maximum safety for the user, while digital technology make furnace soundless, versatile and reliable. Fibre optics connections give the highest immunity to electrical noise also in harsh environment. An accurate study of the coil guarantees a very high heating efficiency while medium frequency magnetic field stirs the molten metal and leads to high homogeneity of the alloys. Temperature control can be chosen between IR optical pyrometer and thermocouple while the electronic board implements an advanced self-tuning thermoregulation algorithm with exact temperature control. Melting plants can be provided with one or more melting stations using a power switch to drive one station or the other. The range temperature is up to 2000 o This Induction melting furnace (Zhengzhou and Siemens) is used in department of Materials and Metallurgy only for melting metal materials and laboratory testing between 5-20kg with different crucibles: graphite, clay, ceramic, steel, etc.
Applications:
- Melting ferrous metals
- Melting non-ferrous metals
- Melting precious metals
 [/accordionitem]
[accordionitem]
COMPUTATIONAL ANALYSIS OF MATERIALS SELECTION
Purpose:
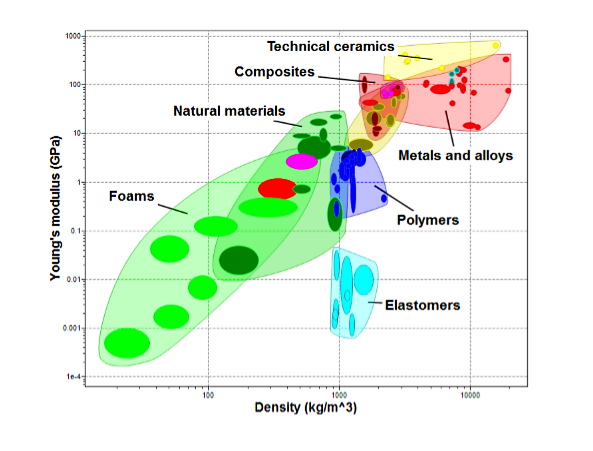
- CES EduPack is designed to provide information, tools, and resources needed to help and prepare students for the real world of materials-related science and engineering. It is available in Standard uses.
Applications:
- Materials
- Metals
- Selection of Materials
- Analysis of design and constitution of Materials
- Analysis of Mechanical properties
 [/accordionitem]
[accordionitem]
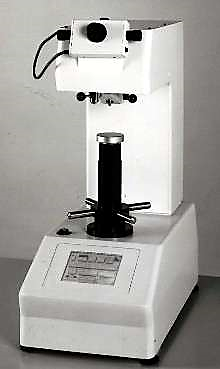
SHIMADZU MICROHARDNESS HSV30
Purpose of equipment:
-
Mirco Hardness Tester Shimadzu HV30 is a key piece of equipment that is indispensable to metallographic research and mechanical properties, product quality control, and the development of product certification materials. For this purpose as long as test samples are carefully and properly prepared, the Vickers / Microhardness method is considered to be very useful for testing on a wide type of materials, including metals, composites, ceramics, or applications such as testing foils, measuring surface of a part, testing individual microstructures, or measuring the depth of case hardening by sectioning a part and making a series of indentations. The loads for Micro Vickers hardness testing methods are typically very low, ranging from a few grams to 2 kgf. The load range for Macro Vickers hardness test procedure can range up to 30 kgf.
Shimadzu HSV-30/30T Semi Vickers Hardness Tester, which has eight types of test forces with a range of 1.96 to 249N and features automatic force changing. The force duration time is 5 to 999 sec and is user selectable in 1 sec. units. The micro measuring device has an effective measuring range of 500 µm (x20) with superior resolution. Measuring modes include Vickers, Knoop, Brinell and triangular pyramid hardness as well as length reading. Shimadzu HSV-30/30T comes equipped with an automatic loading system, a diamond pyramid indenter, and a built-in trouble diagnosis function. An optical monitor with an objective lens (x20) and an eyepiece (xl0) is standard and an optical path can be selected for observation and filming. The HSV-30 also features an easy-to-use electric turret. This equipment is used to department of Materials and Metallurgy in different courses for hardness measurements.
Applications:
- Mechanical Properties
- Metallography
- Product quality control
- Development of product certification materials
 [/accordionitem]
[accordionitem]
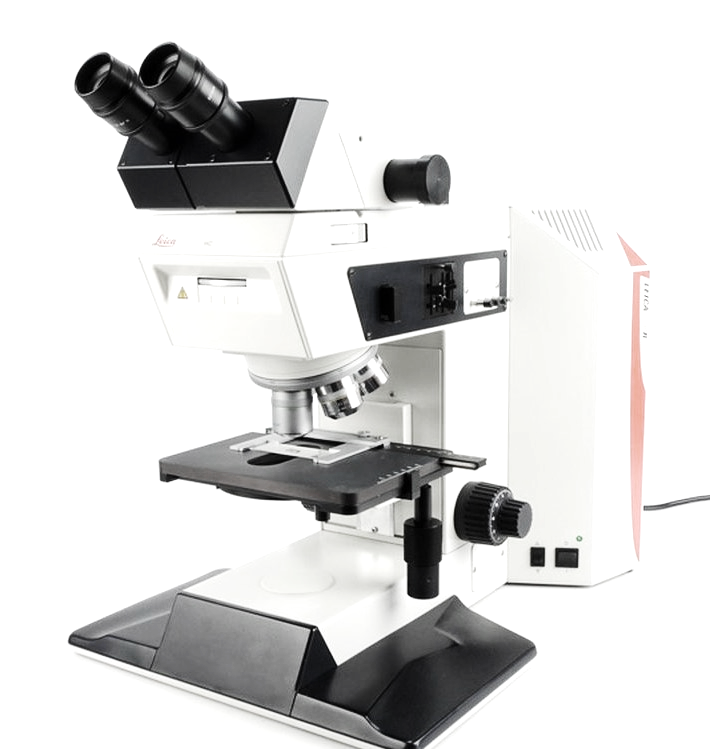
OPTIC MICROSCOPE LEICA DMRX
Purpose of equipment:
-
With microscope Leica DRMX can characterize macro and microstructures, mainly metals. The laboratory is equipped with a powerful system for image analysis. The system allows micro and macroscopic investigation like: shrinkage and gas porosity, cracks, inclusions, grain size, phases etc., as well as microscopic investigations and analyses in light and dark field, in polarized light and with interferential contrast. The light microscope is equipped with software for analysis of microstructure like; (lasX and image analysis).
Applications:
- Shrinkage
- Porosity
- Grain size
- Particles
- Phases
- Fractions
- Boundaries
 [/accordionitem]
[accordionitem]
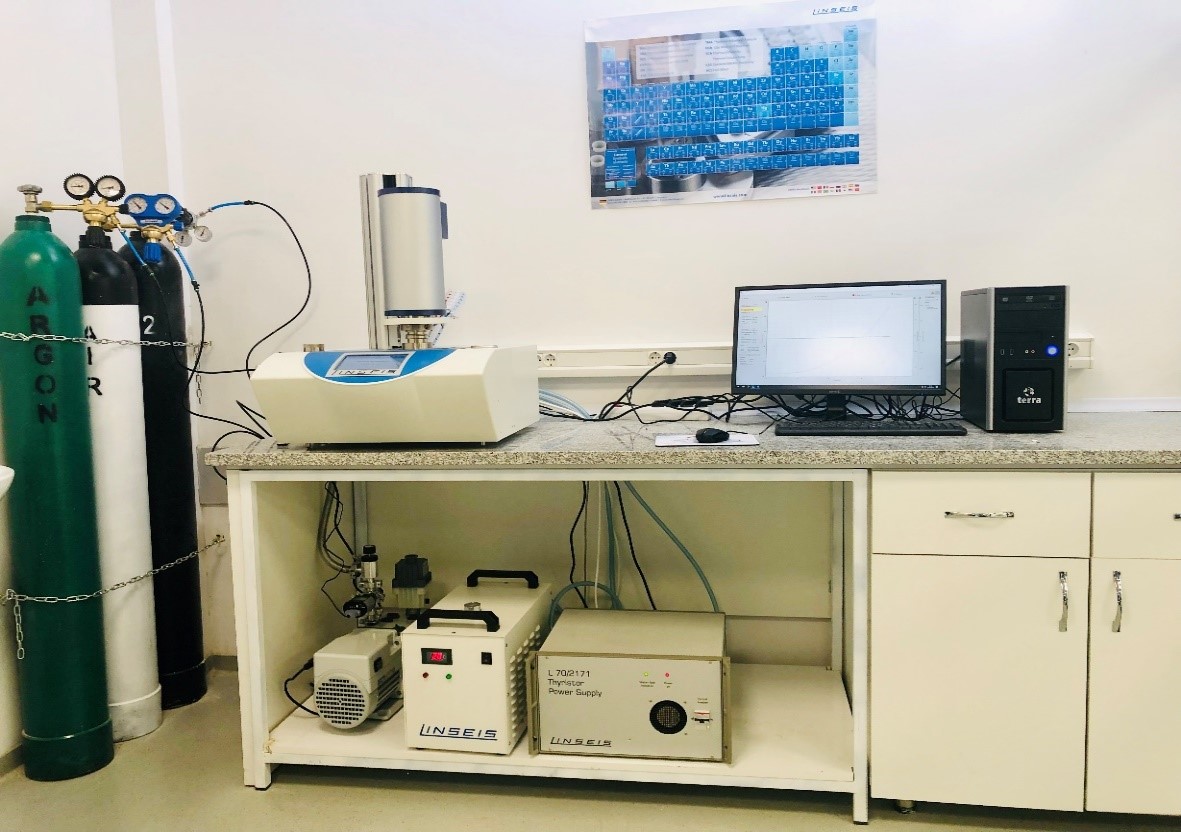
SIMULTANEOUS THERMAL ANALYSIS, STA LINSEIS PT 1600
Purpose of equipment:
-
Simultaneous TGA/DSC measures both heat flow and weight changes in a material as a function of temperature or time in a controlled atmosphere. Simultaneous measurement of these two material properties not only improves productivity but also simplifies interpretation of the results. The complimentary information obtained allows differentiation between endothermic and exothermic events which have no associated weight loss (e.g., melting and crystallization) and those which involve a weight loss (e.g., degradation). The LINSEIS STA Simultaneous Thermal Analyzer can be used to determine simultaneous changes of mass (TG) and caloric reactions (DSC) of a sample in the temperature range from 25°C up to 1650°C. The unique characteristics of this product are highest precision, highest resolution and long term drift stability. This equipment is used to department of Materials and Metallurgy and has these detectors: TG, TG-DTA and TG-DSC.
Applications:
- Mass changes
- Composition of multi component alloys
- Enthalpy
- Endo/ Exothermic reactions
- Phase transformation
- Precipitation of metals and alloys
- Melting point and boiling point
- Crystallization
- Cp determination
- Thermal stability
- Oxidation stability
- Purity
- Solidus / Liquidus relationship
- Product identification
- Annealing
- Melting and Solidification time
 [/accordionitem]
[accordionitem]
CHAMBER FURNACE NABERTHERM N11
Purpose of equipment:
-
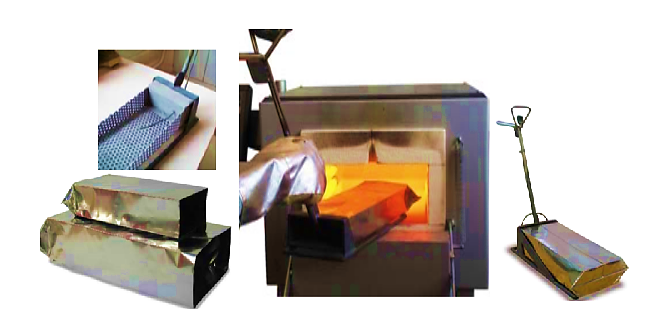
Heat treatments are part of many forming processes. The Nabertherm N11/R heat treatment furnace allows the performance of all common heat treatments used within forming technology. With the integrated inert gas chamber heat treatments with protective gas can be realized. Therefore specific material strengths can be realized without the formation of a scale layer on metal-material.
This furnace is used to department of Materials and Metallurgy such as: heat treatment, annealing, brazing, forging, Nitriding. The chamber furnace is equipped with C5 program controller, oil and water cooling systems, stainless steel heat treat foil, annealing bags, holder with protective gas annealing bag, thermocouple integrated in holder, thermometer connected with holder bag and chamber, the maximum temperature goes up to 1200 oC.
Applications:
- Heat treatment
- Annealing
- Hardening
- Brazing
- Forging
- Nitriding
 [/accordionitem]
[accordionitem]
VERSASTAT 3 POTENTIOSTAT GALVANOSTAT
Purpose of Equipment:
-
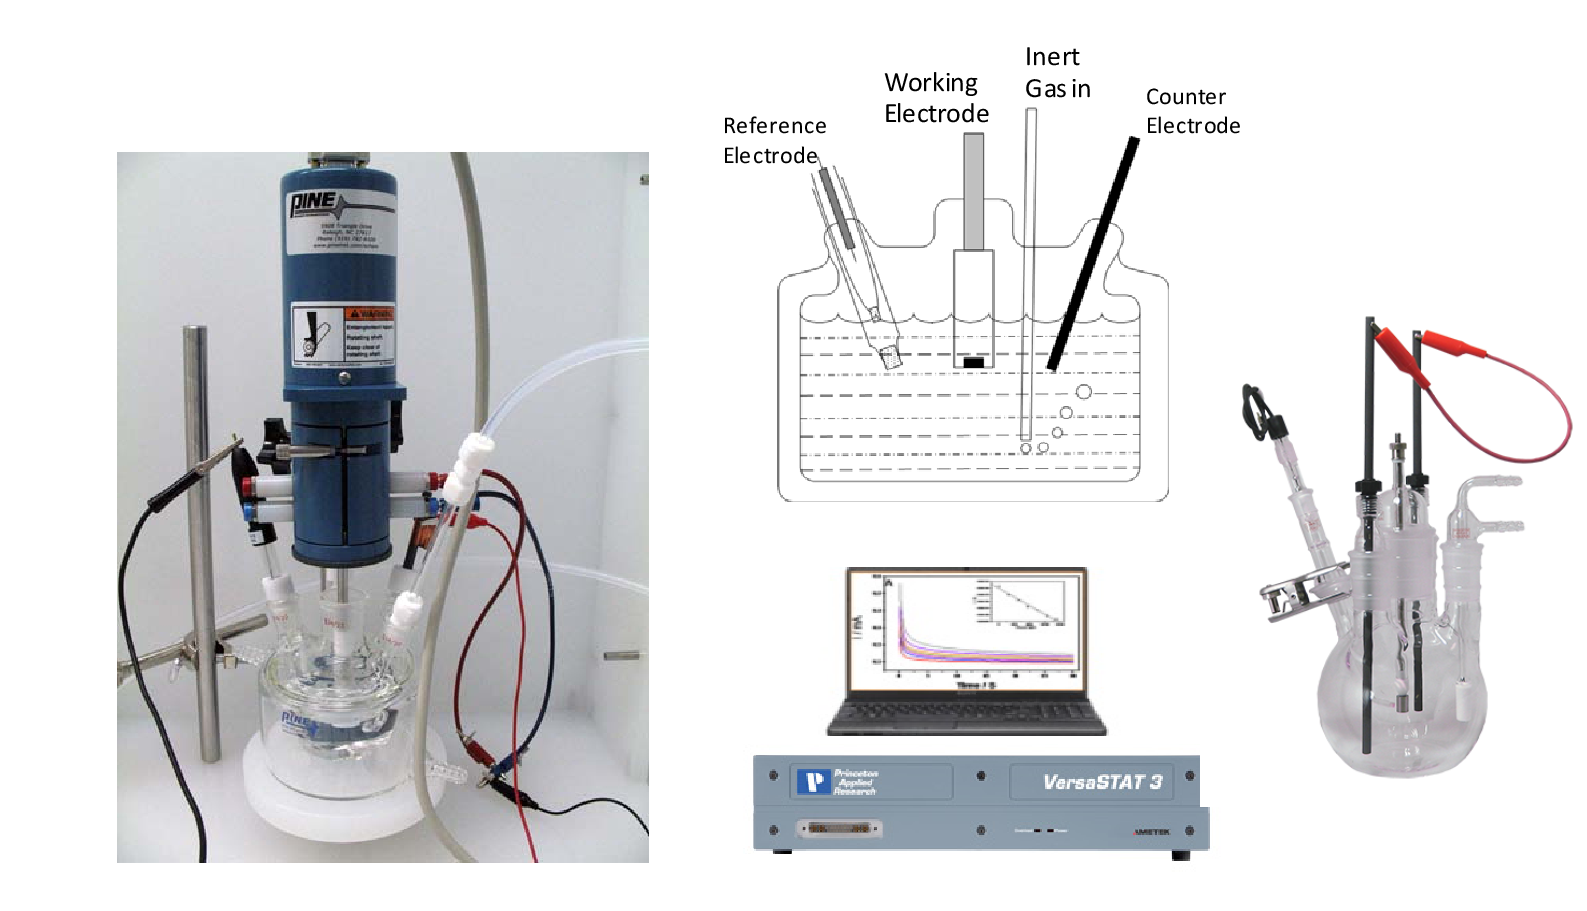
The VersaSTAT 3 is an optioned-based platform that provides both standard core functionality and the ability to expand the range of measurements. This versatile potentiostat and galvanostat addresses many different applications including Corrosion, Energy Storage, Sensors, Nanotechnology, and Physical Electrochemistry.
Equipment VersaSTAT 3 includes the max current capability to ±2A. This expands its capability to test larger samples at higher rates High current boosters up to 20A for battery, fuel cell, or electroplating applications Excellent current measurement resolution for corrosion, coatings, and micro-electrode analysis An internal frequency response analyzer option that provides impedance analysis over the frequency range 10µHz to 1MHz.
VersaStudio software is included with all VersaSTAT 3 systems and users can select from the different groups of techniques that are available:
- Energy providing charge-discharge curves (including CC-CV) for Capacity-vs-Cycle Number or Coulombic Efficiency as well as dedicated techniques such as Constant Power, Constant Resistance and Potentiostatic / Galvanostatic Intermittent Titration Technique (PITT, GITT)
- Voltammetry providing fundamental electrochemical techniques such as Cyclic Voltammetry, Chrono-techniques. The Advanced Voltammetry techniques also include Pulse Voltammetry methods.
- Corrosion providing multiple corrosion analysis techniques, including the most common ASTM standards such as Linear Polarization Resistance (LPR, ASTM G59), Tafel (ASTM G5), Cyclic Polarization (ASTM G61), etc.
- Impedance may be added to any system to provide Electrochemical Impedance Spectroscopy techniques. This equipment is used to department of Materials and Metallurgy in courses of corrosion and protective corrosion and electrochemistry.
Applications:
- Corrosion
- Energy Storage
- Sensors
- Nanotechnology
- Electrochemistry
- Physical Electrochemistry
 [/accordionitem]
[accordionitem]
STEREO MICROSCOPE
Purpose of equipment:
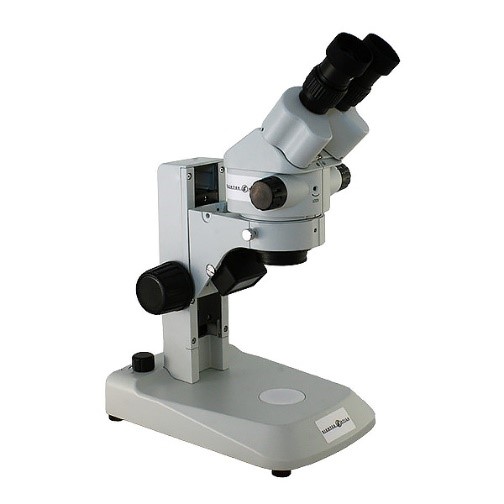
- Stereo microscopes enable research and characterization of metal materials.
Applications:
- Surface Analysis
 [/accordionitem][accordionitem]
DURASCAN 10 G5 HARDNESS EQUIPMENT
Purpose of equipments:
-
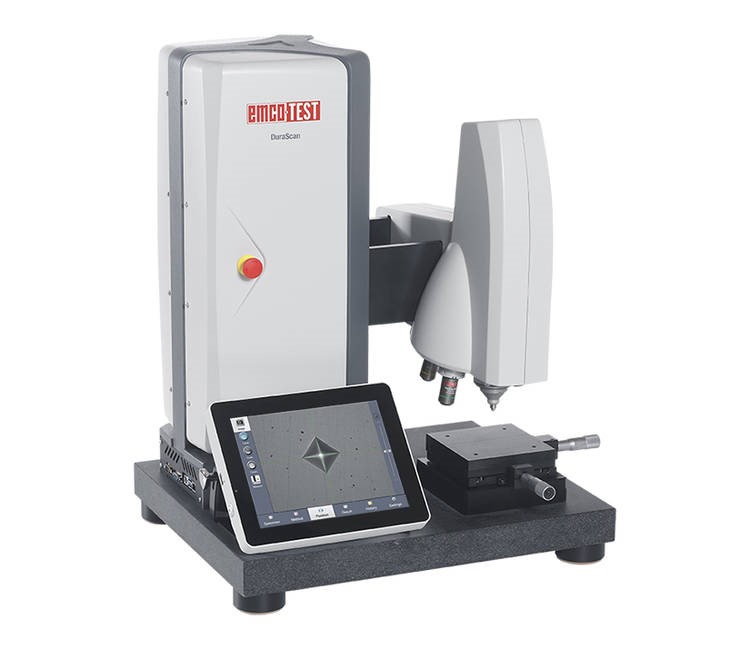
DuraScan 10 G5 fully automatic hardness tester with extended load range for Vickers and Knoop. The proven height adjustment of the test head allows a constant and ergonomic working height. The rapid traverse helps to significantly accelerate the adjustment to different test specimen heights. The scanning function ensures automatic positioning of the test head to the perfect working distance – the camera image is immediately sharp. Vickers/ Microhardness test procedure for Vickers (ISO 6507, ASTM E384, E92) and Knoop (ISO 4545, ASTM E384, E92) standard specifies making indentation with a range of loads using a indenter which is then measured and converted to a hardness value.
-
The machine is operated via a modern capacitive touchscreen with brilliant image reproduction. The surface made from mineral glass is significantly more resistant to scratches than plastic surfaces. It goes without saying that only components are employed that have been developed for use in an industrial environment. This equipment is used in department of Materials and Metallurgy in different courses and testing samples. Micro/macro hardness test extended load range from 10 gf to 10 kgf for Vickers and Knoop tests.
Applications:
- Testing metals
- Testing materials
- Quality and control testing
- Mechanical Properties
 [/accordionitem][/cq_vc_accordion]
